Replacing Heroku with Render to Deploy Free Apps (in less than 10 minutes)
Heroku is phrasing out all free plans, which is a huge headache for many developers around the world.
I loved Heroku because you can start anything on Heroku, and if it turns out you have to scale up, you just press a button.
Heroku attributes this change to fraud and abuse, but so many developers, especially beginners, relied on Heroku's free apps.
Many developers and beginners use Heroku free apps for:
- hosting simple APIs
- learning how to deploy apps
- making demo apps
- starting a business without much traction yet
Heroku was simply the best way to deploy apps for free, which can easily be scaled up later with paid plans.
There are a bunch of Heroku alternatives like fly.io, Railway, but the closest thing to Heroku I've found is Render.
Why Render?
Here's what Render offers:
- Free tier apps auto-sleep on inactivity (just like Heroku)
- You can have as many apps as you want as long as the total monthly runtime usage is under 750 hours (just like Heroku)
- Postgres database is free for the first 90 days, and the paid version starts at only $7/mo. All of your apps can link to this single database, which costs only $7/mo in total (unfortunately it's not free like it used to be on Heroku, but it's close enough)
Free tier apps auto-sleep on inactivity so you can have as many as you want as long as the total monthly runtime usage is under 750 hours.
— Anurag Goel (@anuraggoel) August 27, 2022
Moving from Heroku to Render (in under 10 minutes)
It took me less than 10 minutes in total to deploy a Ruby on Rails app on Render.
The first thing I did was going through Render's documentation: https://render.com/docs/deploy-rails#deploy-to-render. Render has very comprehensive documentation.
There were only 5 small steps I had to do to make my app deploy on Render.
Step 1: change config/database.yml
Unlike Heroku, Render reads the database configurations in config/database.yml.
Under the production group:
production:
  <<: *default
  adapter: postgres
  encoding: unicode
  pool: <%= ENV.fetch("RAILS_MAX_THREADS") { 5 } %>
  url: <%= ENV['DATABASE_URL'] %>
Step 2: change config/environments/production.rb
In config/environments/production.rb, change this from:
config.public_file_server.enabled = ENV['RAILS_SERVE_STATIC_FILES'].present?
to:
config.public_file_server.enabled = ENV['RAILS_SERVE_STATIC_FILES'].present? || ENV['RENDER'].present?This lets Render knows that we should serve static files for Rails.
Step 3: add render.yaml
Render uses render.yaml for deployment. It helps us allocate a Postgres database for our Rails app:
databases:
  - name: mysite
    databaseName: mysite
    user: mysite

services:
  - type: web
    name: mysite
    env: ruby
    buildCommand: "./bin/render-build.sh"
    startCommand: "bundle exec puma -C config/puma.rb"
    envVars:
      - key: DATABASE_URL
        fromDatabase:
          name: mysite
          property: connectionString
      - key: RAILS_MASTER_KEY
sync: falserender.yaml creates a Postgres database and creates a web server.Step 4: bin/render-build.sh
Last but not least, we will add a simple shell script to build our app:
#!/usr/bin/env bash
# exit on error
set -o errexit

bundle install
bundle exec rake assets:precompile
bundle exec rake assets:clean
bundle exec rake db:migratebundle install , precompile assets and run migrations on the databaseStep 5: Deploy on Render's dashboard
Once you have committed the above changes to the repo, we can now easily deploy an app on Render's dashboard.
Go to "Blueprints". Log into your GitHub account. Connect to a repository.
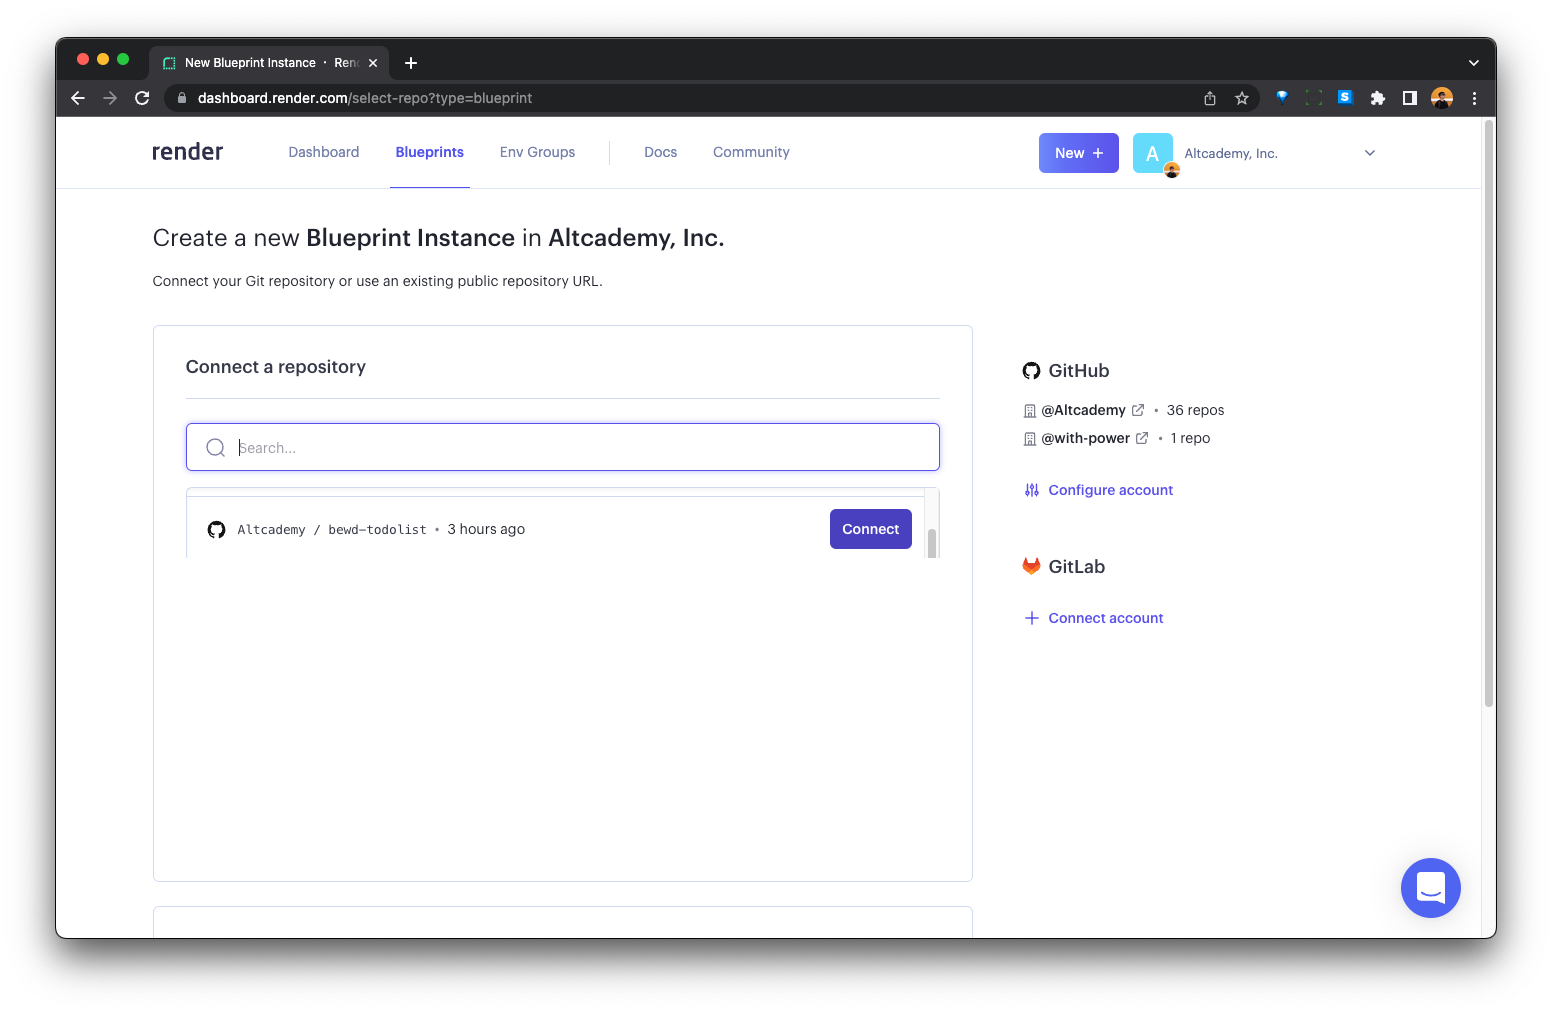
Give a name to your app on Render. Select the repository branch you want to deploy.
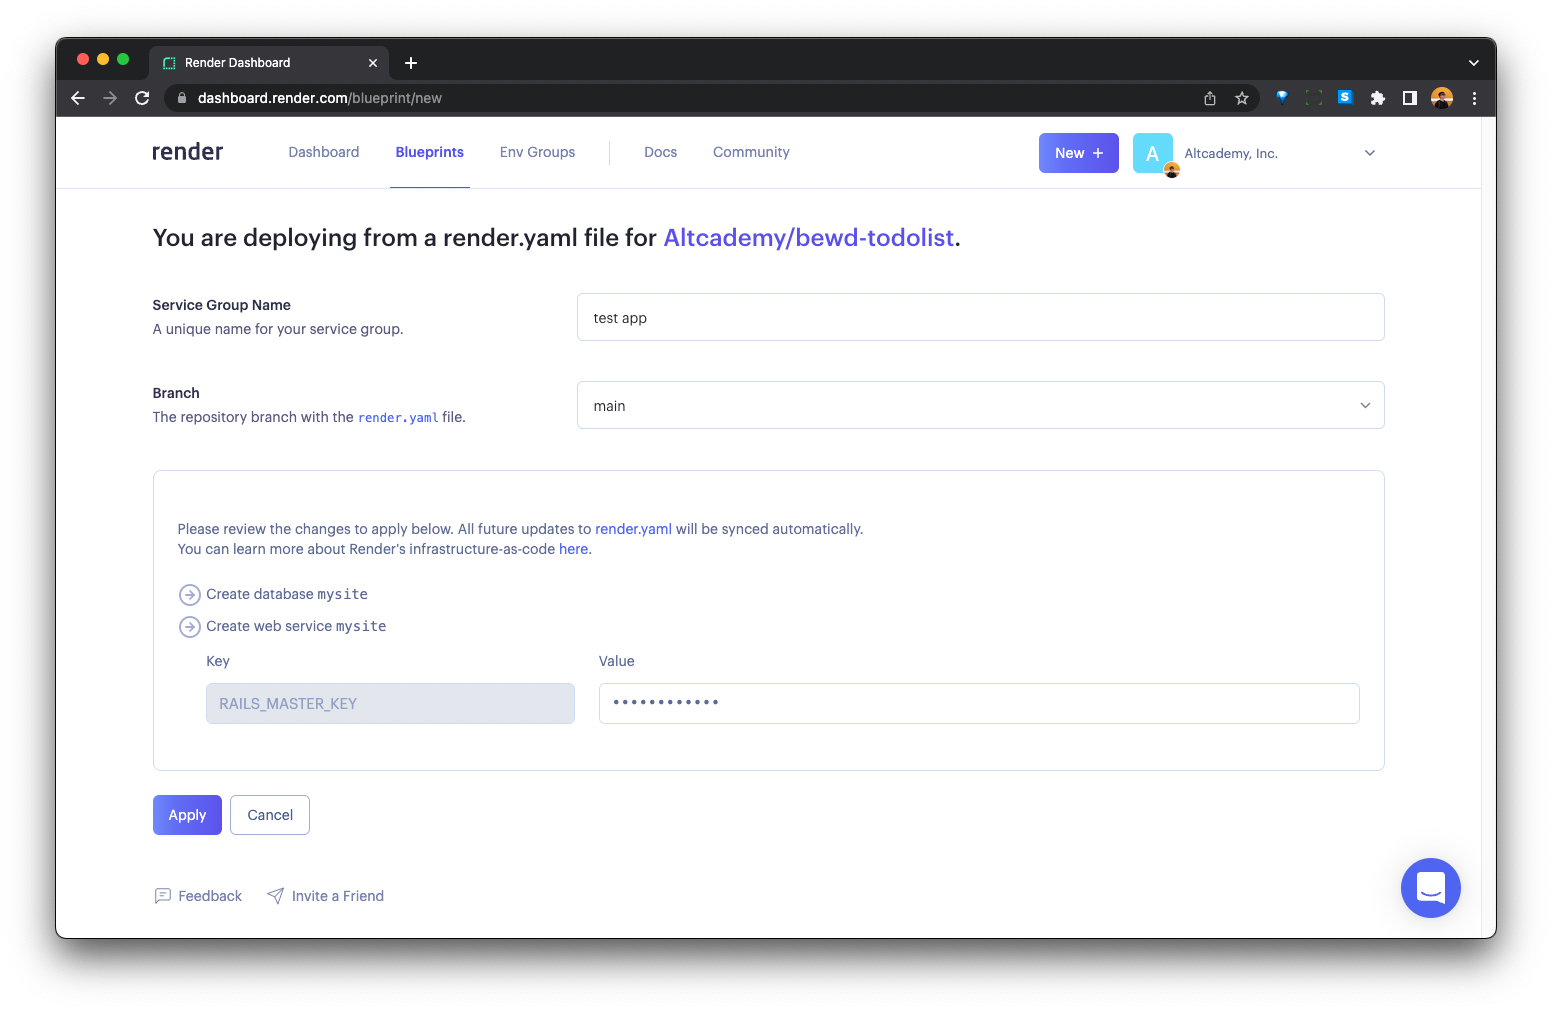
Now, both the Postgres server and the web server are being deployed on Render.
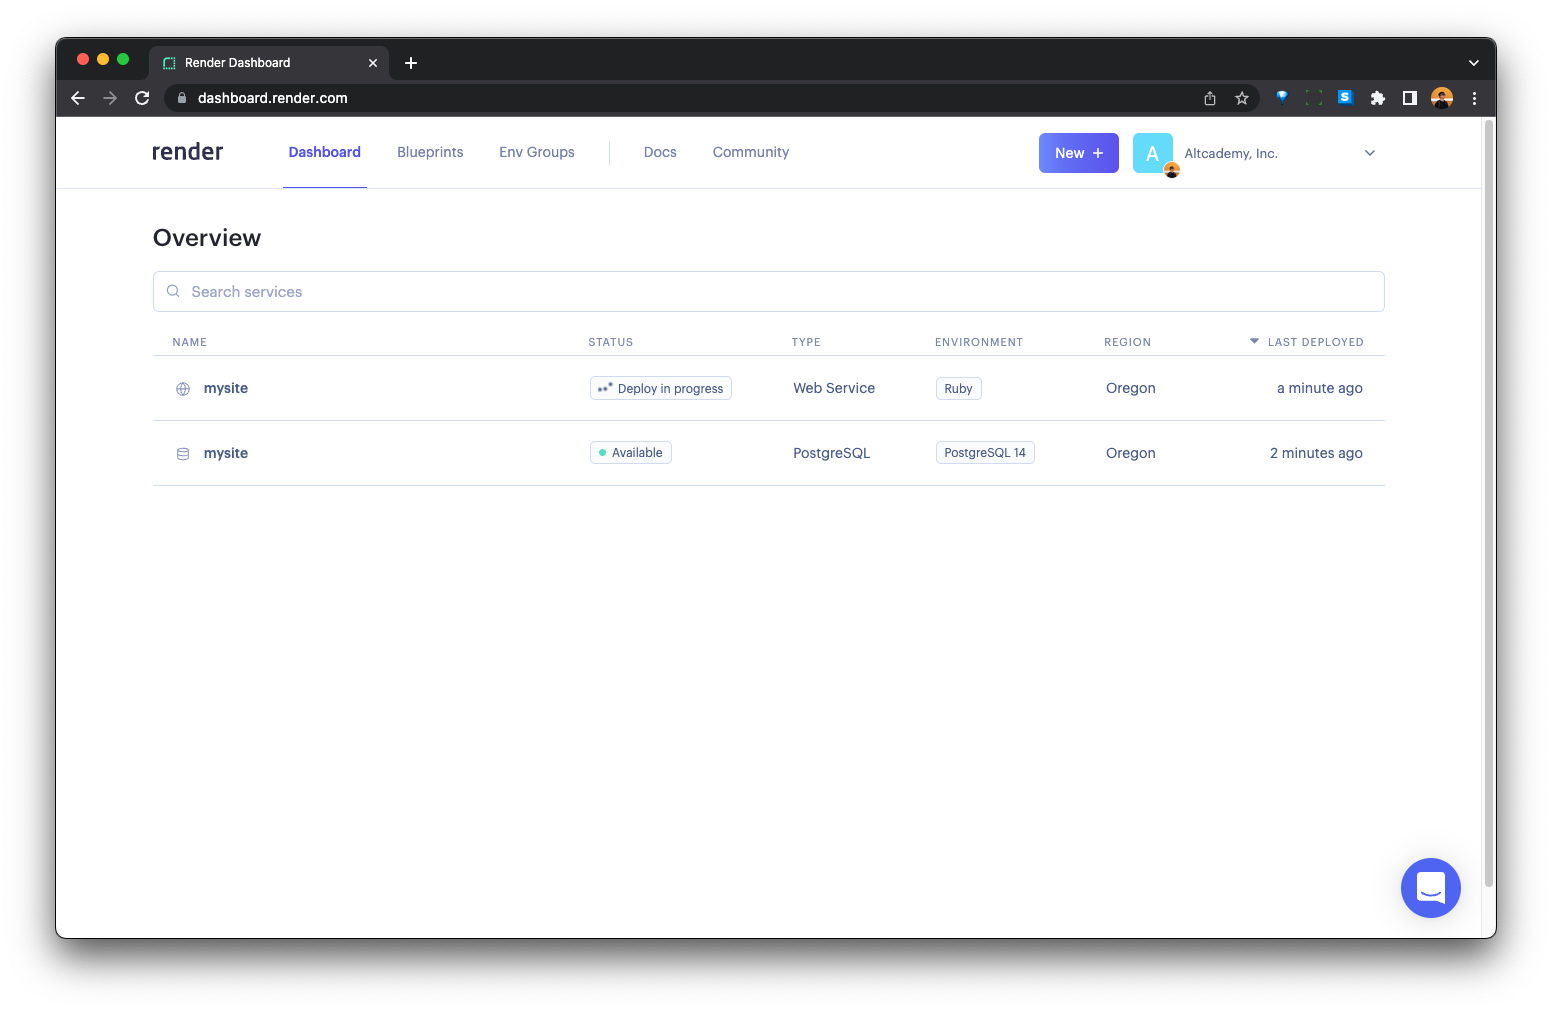
You can click on "Events' to see the deployment logs.
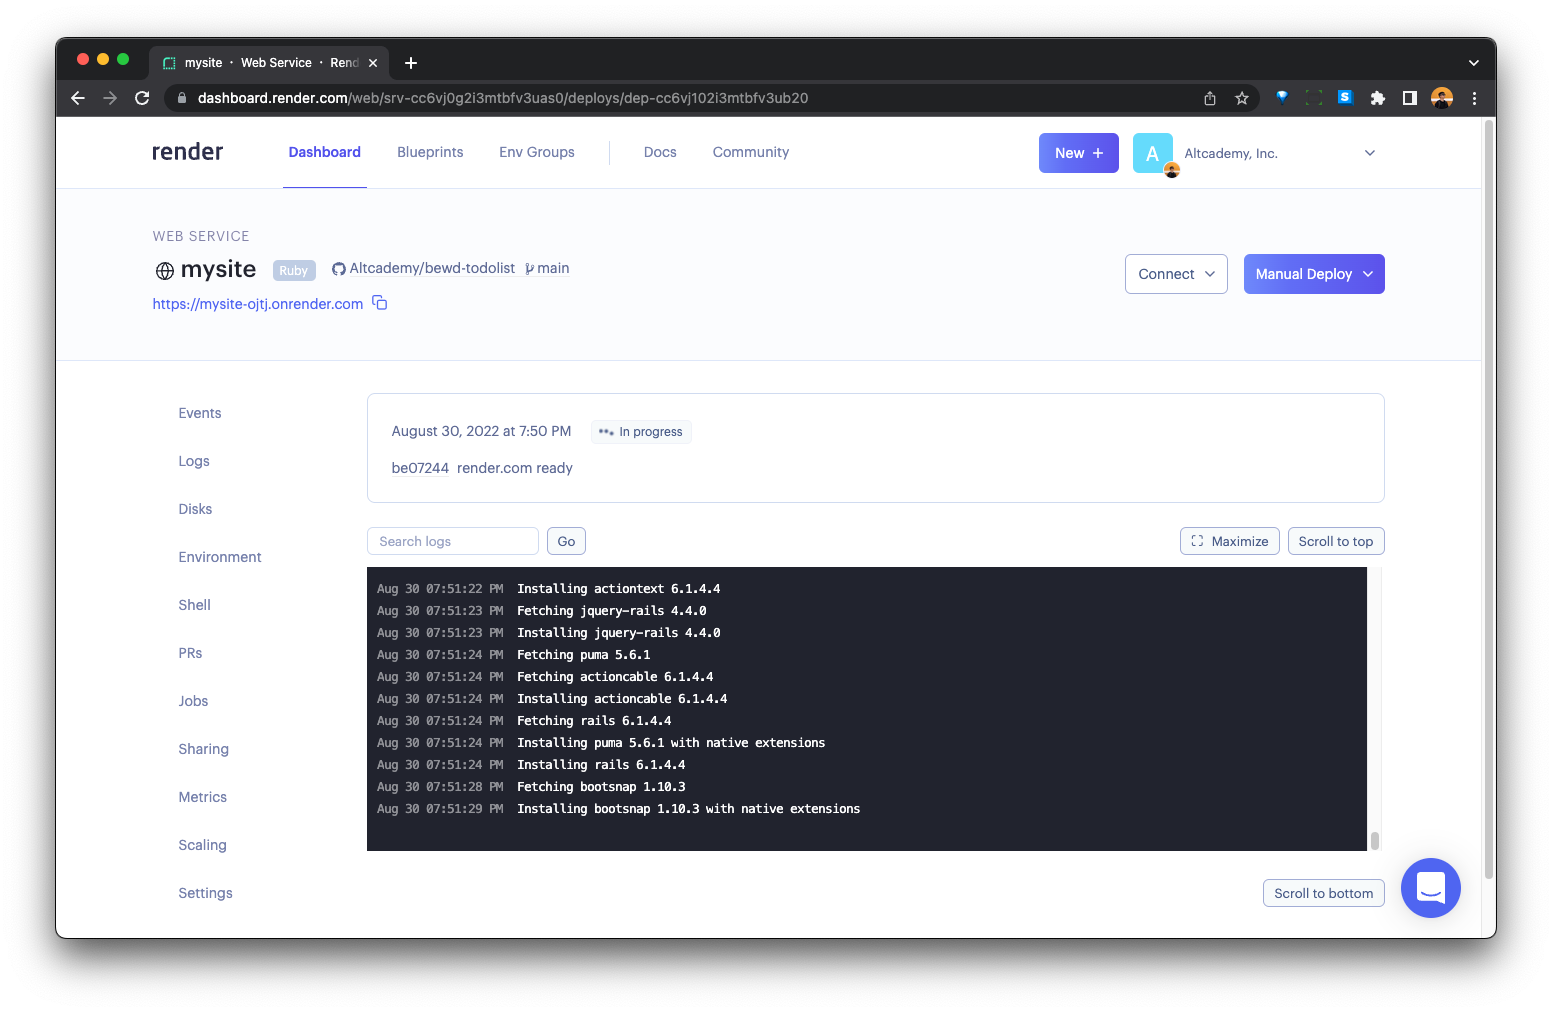
Once the web server is successfully deployed, you can go to "Logs" to track the web server logs. You can also click on the URL to visit your app now!
Now, like all deployments, there must be some problems to fix. In this case, as shown on the logs, an environment variable is missing.
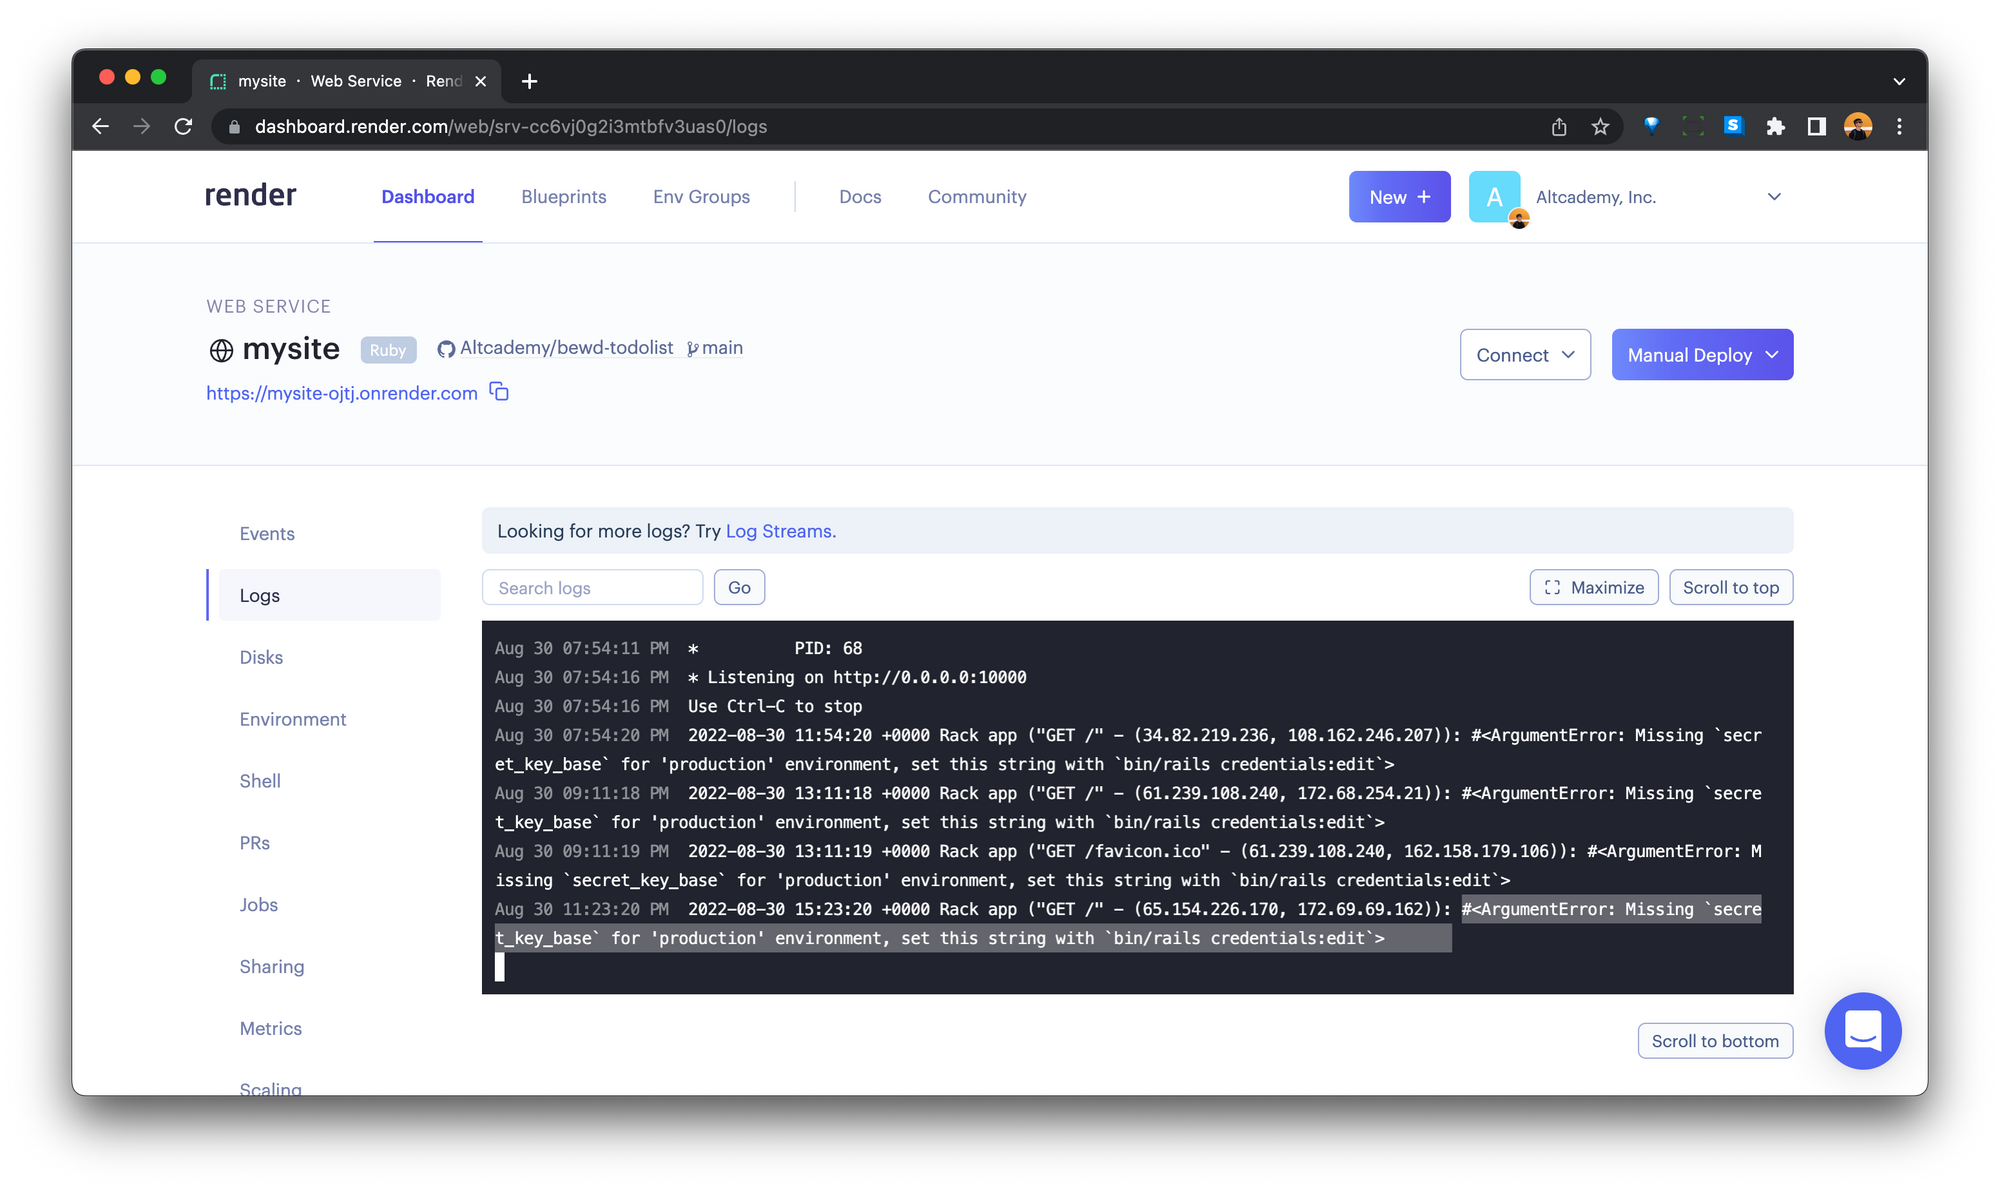
So, we add the environment variable under "Environment".
Once the new environment variable is added, the app will be automatically redeployed.
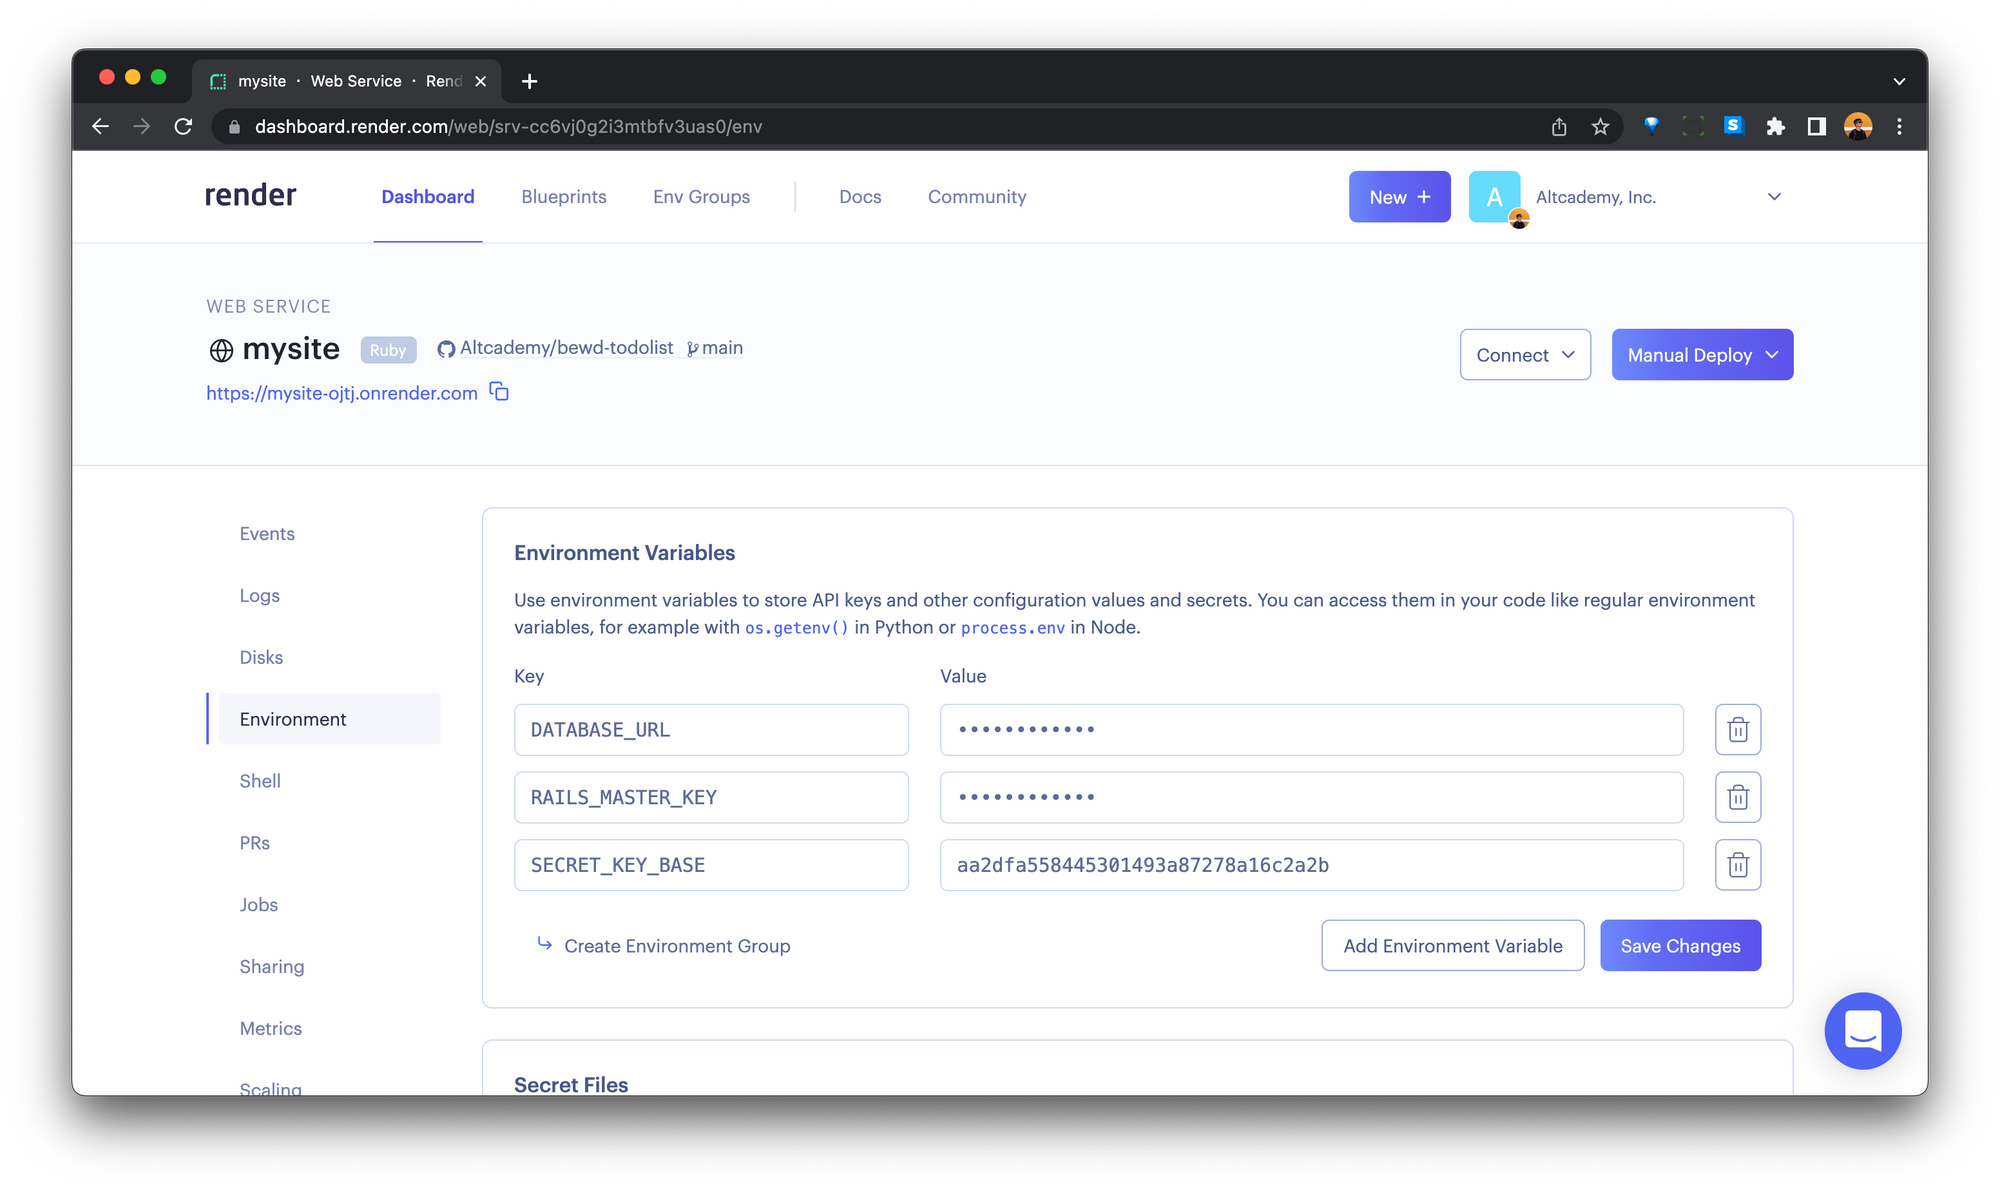
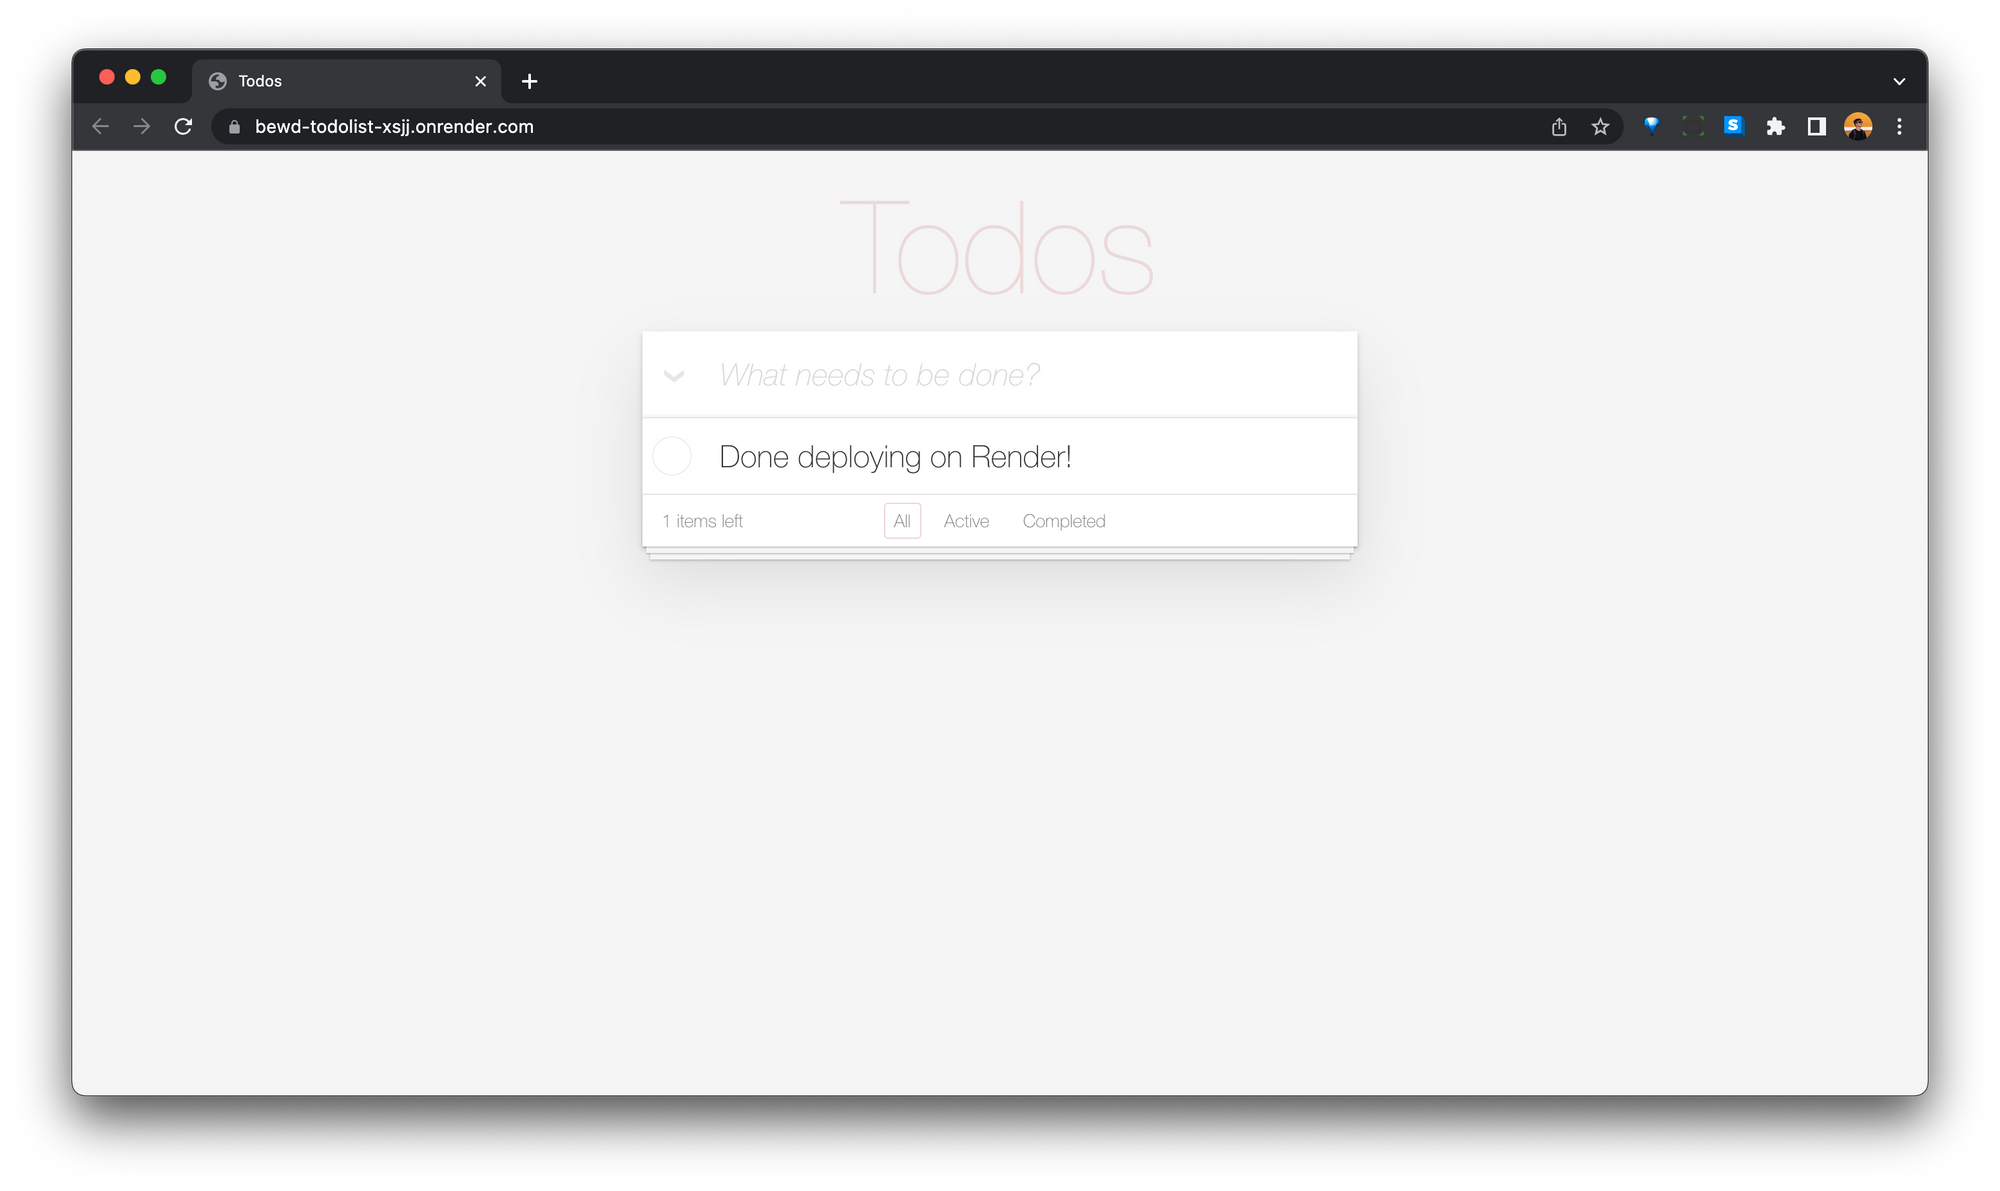
And, we are done! The app is deployed and working!
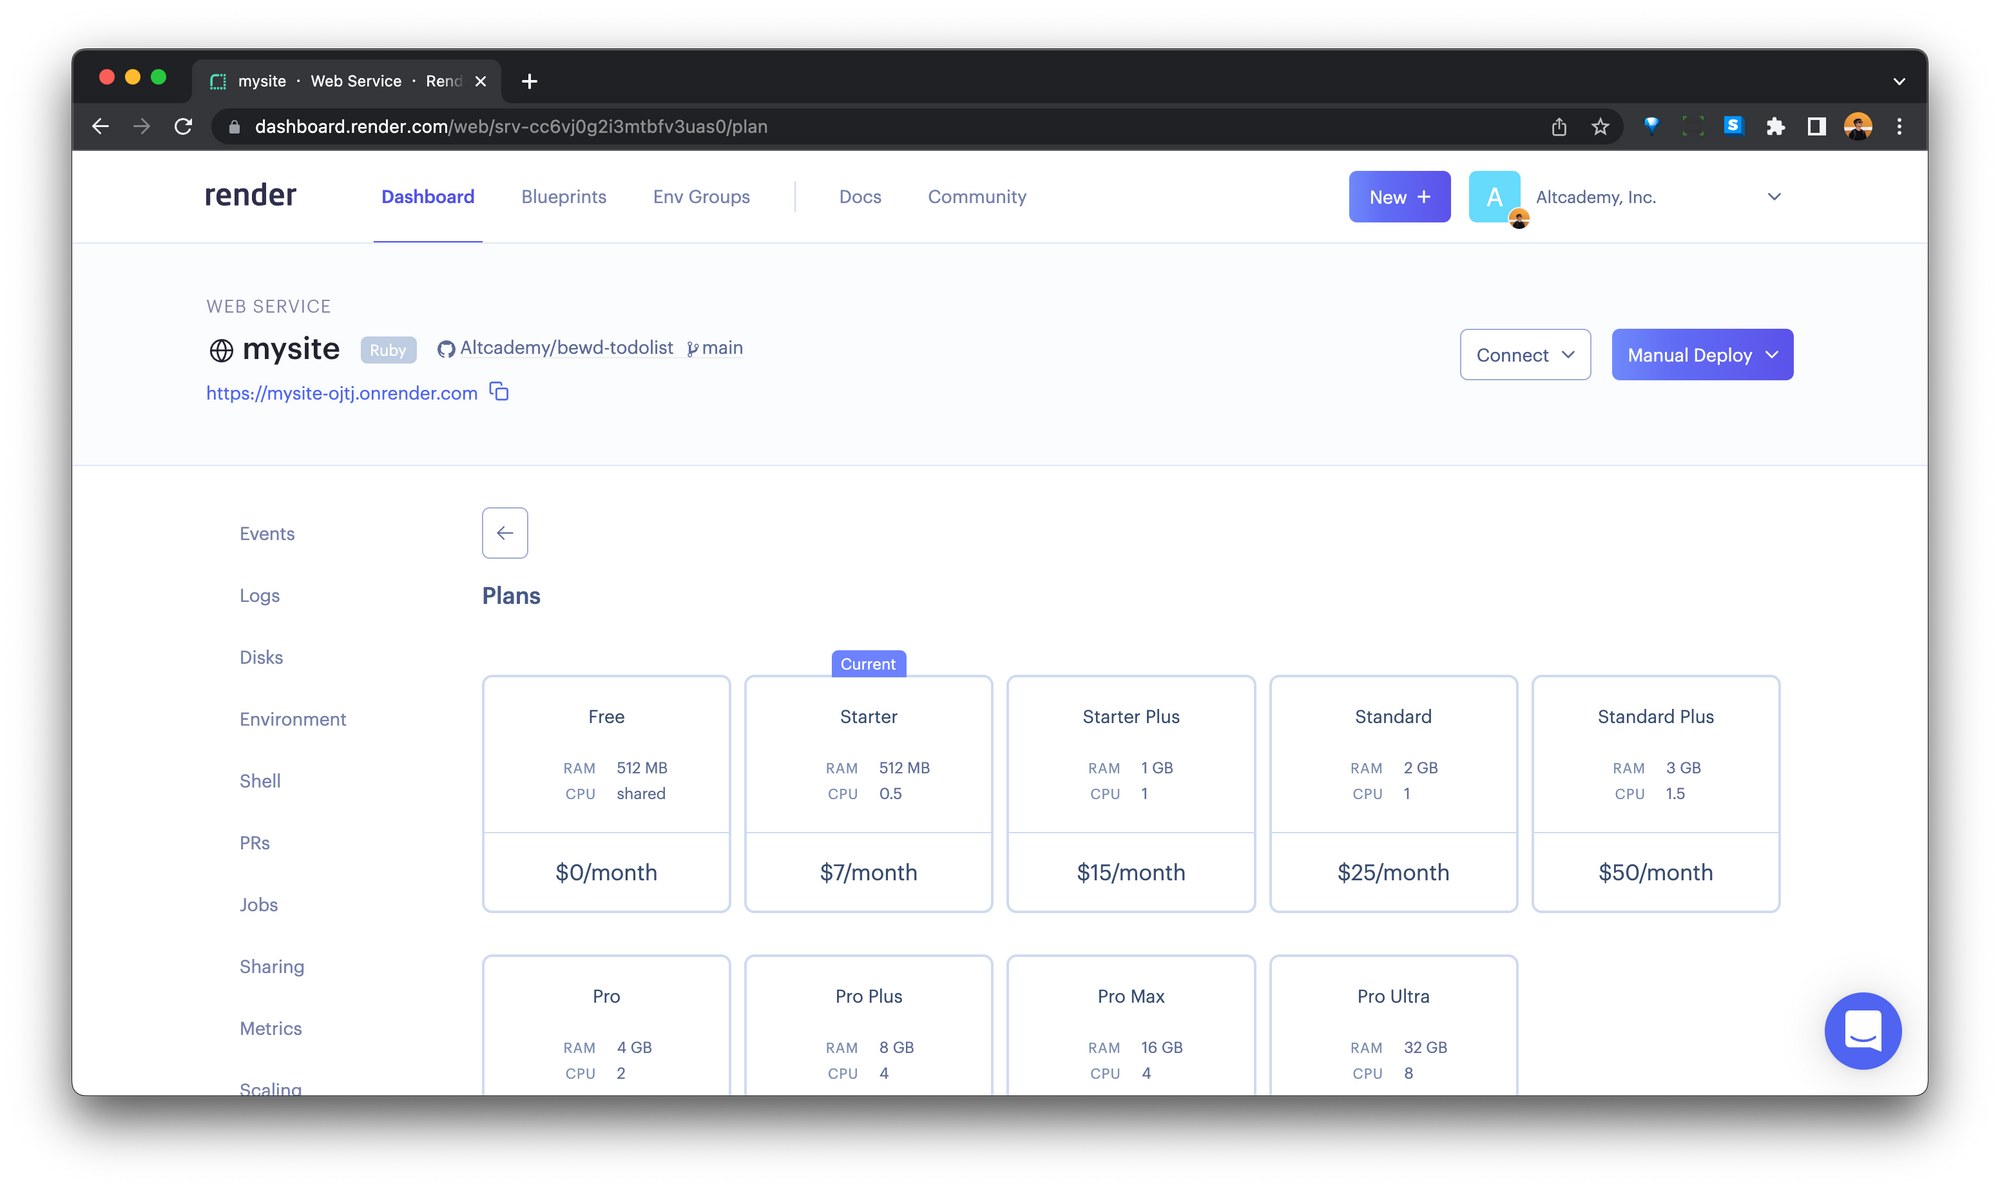
You can also upgrade/downgrade your web server, so it remains free!
I hope this helps you move your free apps from Heroku to Render in no time!